By Kaitlin McHenry
Right now, it is cold and the ground is covered in beautiful sparkly white snow. Many of us are dreaming of the warm summer days and flowers. For a cut flower farmer, seeds, dirt, and growing are already on the mind and starting very soon!
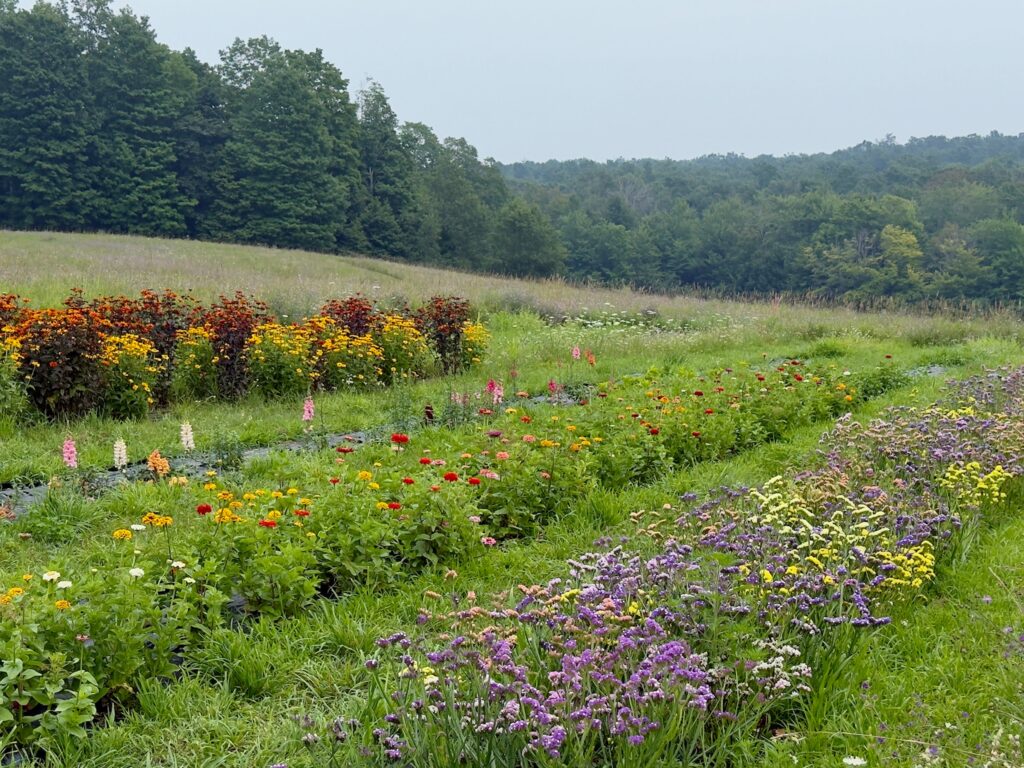
Cut flowers are a beautiful addition to any garden. They are versatile for growers and guests as well as a great resource for pollinators and birds. In northern Michigan, our growing season is a little shorter than southern latitudes. The first week of June is usually when we can confidently plant without the danger of frost. In order to maximize our cut flower growth and harvests, we start some of our plants from seeds indoors and transplant them in June. This allows us to start seeing some of our star player flowers by July rather than late August.
Starting cut flowers from seeds also saves money compared to buying them from external sources. Our cut flower plot features five rows (and expanding!) by 100ft long and can account for thousands of plants in the whole plot. Seeds are a cost-effective way to produce plants in this quantity, but proper steps and growing conditions are a necessity to success.

Plant Species and Growing Conditions
First things first. What kinds of cut flowers are you interested in growing? Are they annuals or perennials? What growing zones can they live in? What is their timeline from seed to maturity?
Most of LHF’s cut flowers are annuals that we reseed every year, but we have some perennials including False Sunflowers and Yarrow, that are suited for our growing zone (5a-5b). We also have some perennials that we treat like annuals because they are not hardy in northern Michigan winters such as Statice flowers.
In general, annuals are easiest to start from seed because the plants are prepared for their entire life cycle to take place in one year, therefore, they grow faster. Perennials can be started by seed also, but it is important to find out the growing time to maturity. For some perennials, this process can take several years from seed to significant blooms, and it would be more efficient to buy bare roots or small plants from a reputable nursery instead. We bought our perennial False Sunflowers as bare roots from Walter’s Gardens, and they bloomed beautifully in their first season and every season since.
When starting plants from seed, read the growing information and pay close attention to the number of days from “seed to bloom” and “start ‘x’ many days/weeks before last frost”.
“Seed to bloom” time will help you estimate how long it will take until your plant is harvestable. If you have a desired bloom window, backtrack in your calendar to determine when seeds should be started. But one more thing to consider before you let this be your guide, “start ‘x’ days/weeks before last frost”. This is even more important than your “seed to bloom” factor, because this will help guide you not to start seeds too early.
For example: seeds take 90 days from seed to bloom; start seeds 4 to 6 weeks before planting / last frost.
Last frost: June 1st
If I want my plants to bloom by mid-June, I trace back 90 days to a seed time of mid-March, BUT this plant is recommended to start seeds 4 to 6 weeks before last frost which tracks back to mid-April or early May.
So which dates should I follow? Follow the “x days before frost” which is mid-April to early May. This info is more important because it makes sure your plant is not getting too big and outgrows the indoor nursery before it is time to transplant.
Remember, seeding indoors can get you a major headstart in blooms, but you can only start them as early as your spacing allows your plants to grow which brings us to our next key factor to consider.
Spacing
Spacing is the limiting factor when it comes to growing plants indoors. How much space will each plant need, and how much space is there available for the whole nursery?
Decide what method you are using for seed starting. You can use plastic trays such as 36 cell, 72 cell, or 102 cell trays.
OR you could try a more environmentally friendly method called soil blocking (more on that below). Determine how many soil blocks fit on one tray.
Measure the dimensions of each tray and plan out how they can fit in your growing space. Shelves work wonders in saving floor space.
Number of trays times the number of cells or blocks per tray = total plant capacity
Remember, the smaller the cell or the soil block, the more plants can be started in one space BUT they will outgrow their space faster and need to be “potted up” at some point. Still, starting smaller than you plan to finish saves grow lights, water, and labor for the earlier part of the process.
One way I approach this process is staggering my seeding by plant type. I start the seeds that take the longest to grow first in micro soil blocks which save me a ton of space in the beginning, and this allows me to start more seeds than I plan to grow. Seedling loss will naturally happen so always seed more than you plan to grow!
As time moves forward, I will need to expand my growing space for growing plants and new additions of seeds of faster growing plants.
Soil and Growth
Choosing the proper seed starting soil is essential to successful germination and plant growth. The proper seed starter soil is light, not compact, to allow for quick root growth and nutrient filled to provide the building blocks for seedling growth.
I use Seed Starter 101 mix from Morgan Composting. It’s an organic mix filled with everything growing seedlings need, and it is the perfect consistency for me to mold into soil blocks while staying light and airy enough for root development.
I choose to start seeds by soil blocking because it saves space, it reduces plastic use, and it is better for plant root health and reducing transplant shock. The miniature soil blocks can easily be potted up into larger soil blocks. Since there is no solid barrier containing the roots, they self prune when they grow to the perimeter of the block. When the mini soil block is placed into a larger block, the roots will grow into the new soil space. In plastic trays, the soil is contained and the roots never reach air, so they continue to grow around the edge of the plastic and may become root bound. This makes it more difficult for the plant to establish when planted in the ground. Plastic trays can still be used, but remember to check on root growth and not leave them in the plastic trays too long.
The same seed starting soil mix can be used in both settings, and the germination process will be similar in both plastic trays and soil blocks. I will continue to explain the process via soil blocking.
Once the soil blocks are shaped, I sprinkle a layer of vermiculite on top before placing the seeds. The vermiculite is a soil-less growing media to keep conditions sterile for the seeds. While the soil is important for healthy seedling growth, the seeds themselves don’t need soil at all to germinate! All they need is water, light, and heat. Seeds contain everything a plant needs until the first set of true leaves comes in. All plants are unique, but in many cases, seeds require heat and consistent moisture to germinate. Germination can happen within days to weeks and the humid and warm conditions need to be consistent. The seeds are not the only thing that prefers these conditions. Bacteria, fungi, and molds can also appear in this setting, and they are a big threat to seedlings. The most important thing about seed starting material for germination is keeping conditions sterile. A soil-less starting medium does not contain any pathogens and provides seeds a better chance of surviving the delicate germination process.
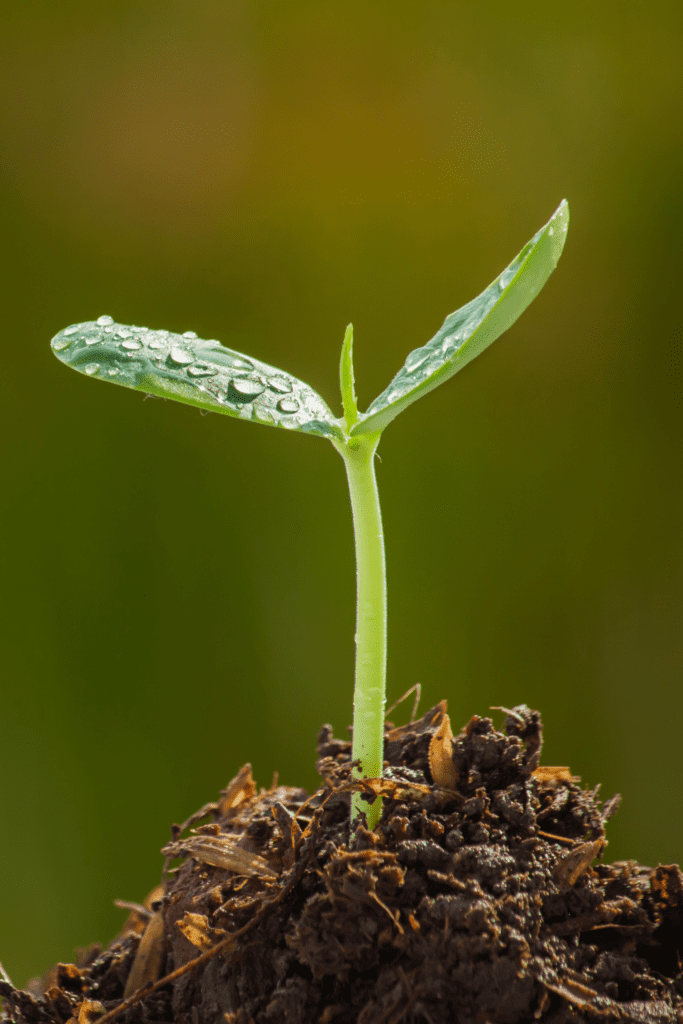
Seeds that need light for germination get placed and gently pressed into the vermiculite. Seeds that need to be covered will have more vermiculite sprinkled on top. Once the seeds germinate, they will grow roots past the vermiculate into the nutrient rich soil and their leaves grow up towards the light.
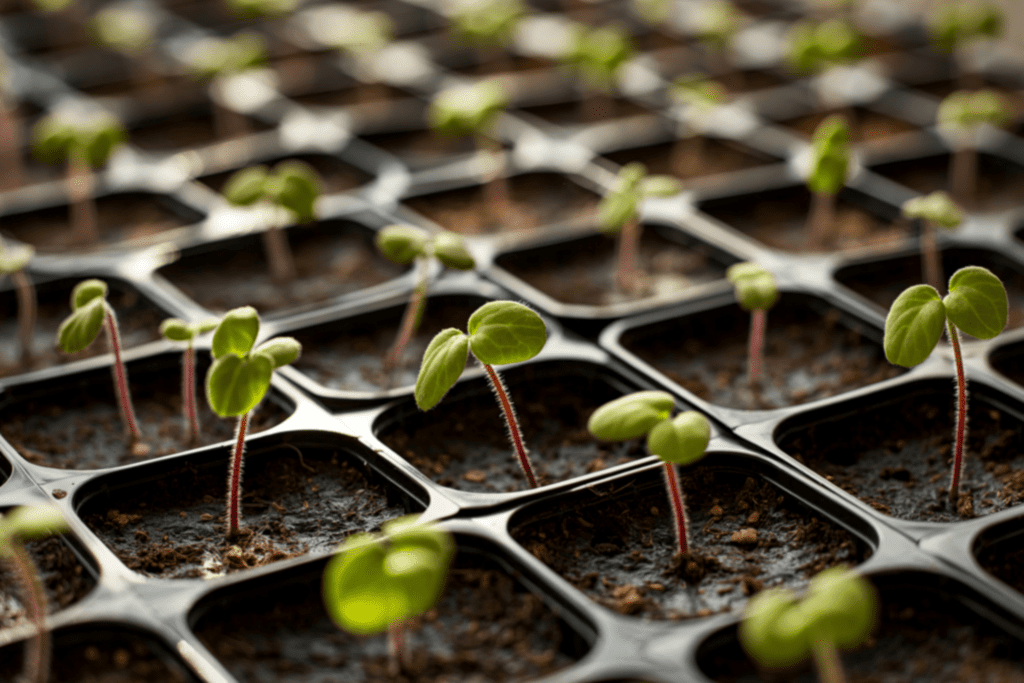
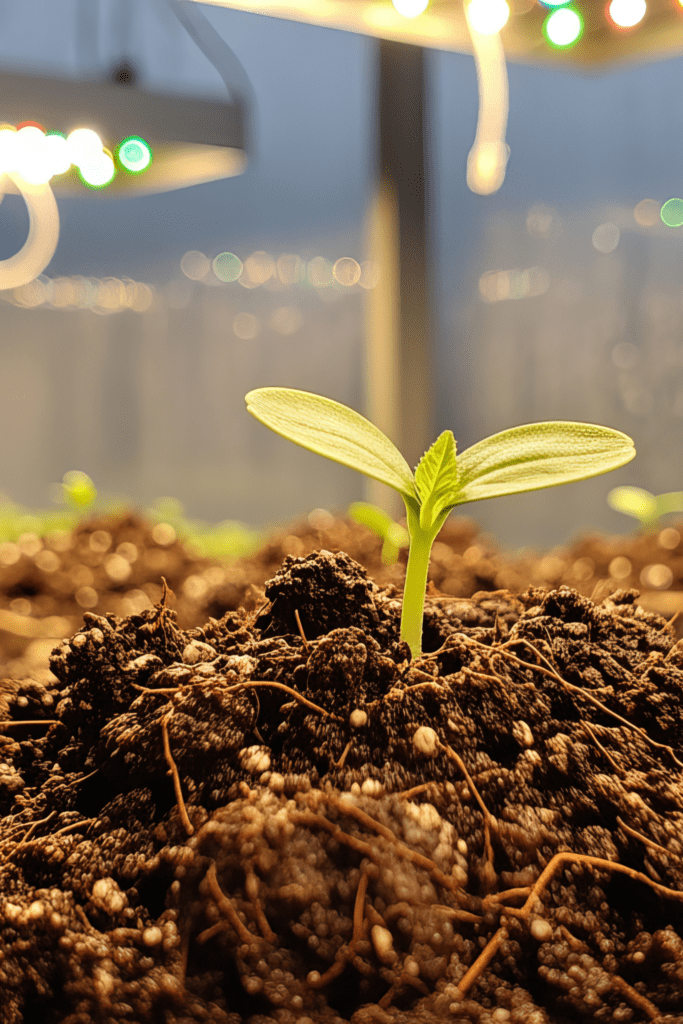
You can see the Zinnia seedlings are emerging from the vermiculite, many of them still have their seed “hats” on as their seed leaves open up. These seed leaves are also known as “cotyledon”. They are smooth and do not necessarily resemble the plant’s true leaves. A seed contains all of the energy needed to grow the cotyledon leaves, and then these seed leaves open and begin the process of photosynthesis for the seedling to start harnessing the energy of light to continue its growth (Whiteside).
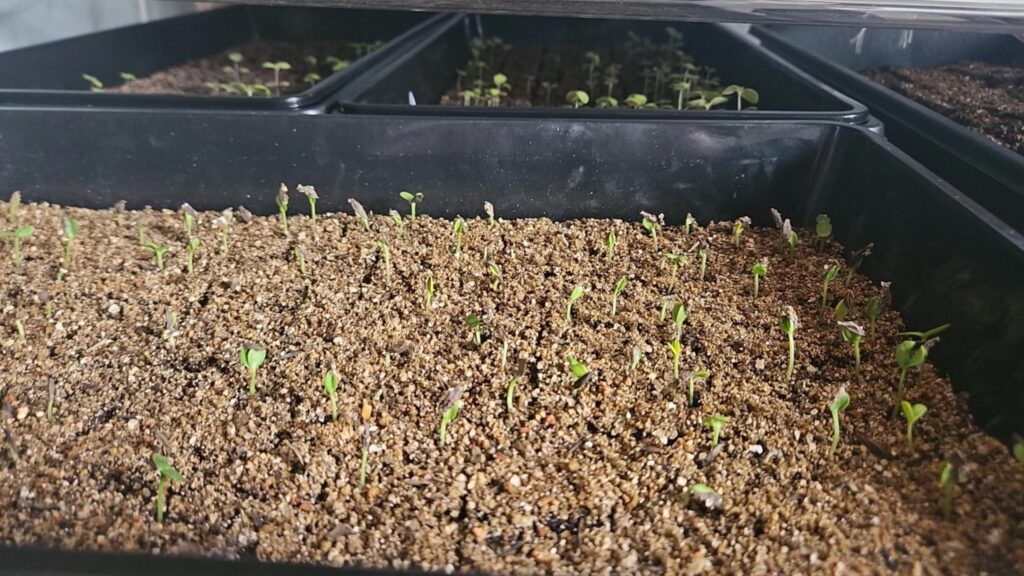
Different plants have different recommendations for fertilizing or pinching leaves referencing the seedlings sets of “true leaves”. These cotyledon seed leaves are not the first set of true leaves, so if a certain plant variety comes with instructions to fertilize once the “first set of true leaves” appear, this refers to the first leaves after cotyledon leaves. The first true leaves will resemble the plant itself.
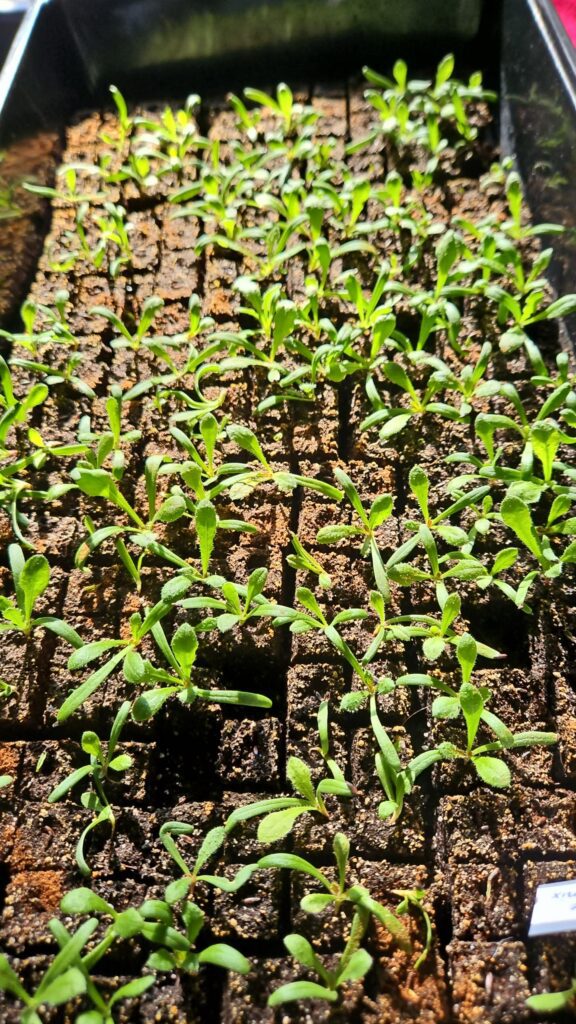
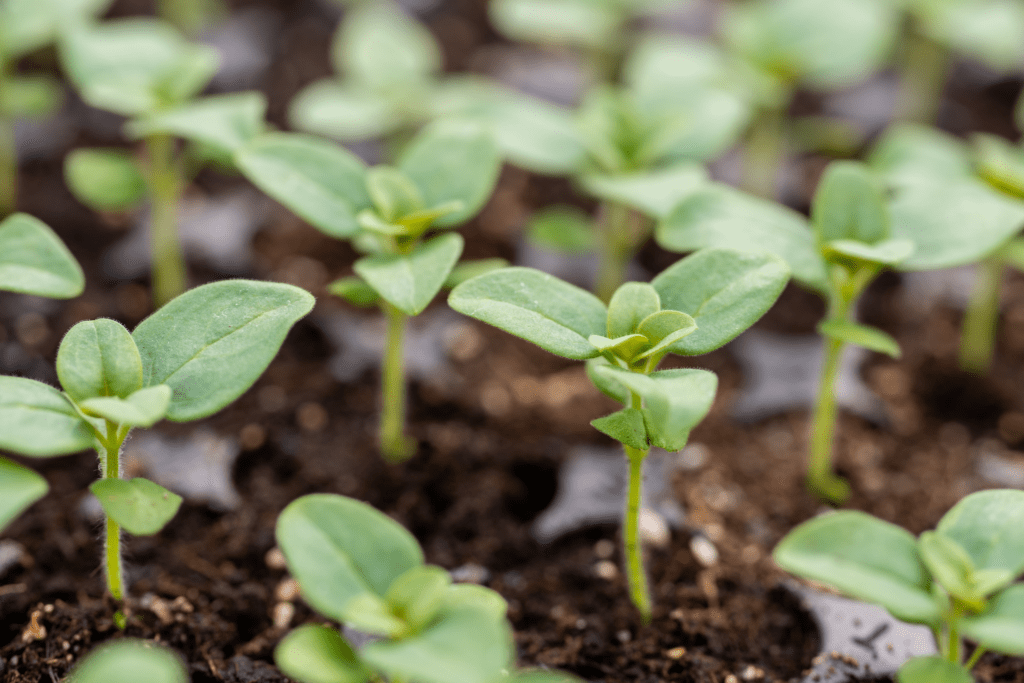
I can fit nearly three hundred seedlings in one tray in micro block form. This allows me to start more seeds than necessary since late seed development and losses will happen naturally. You can see several blocks have been removed while others are simply much smaller seedlings.
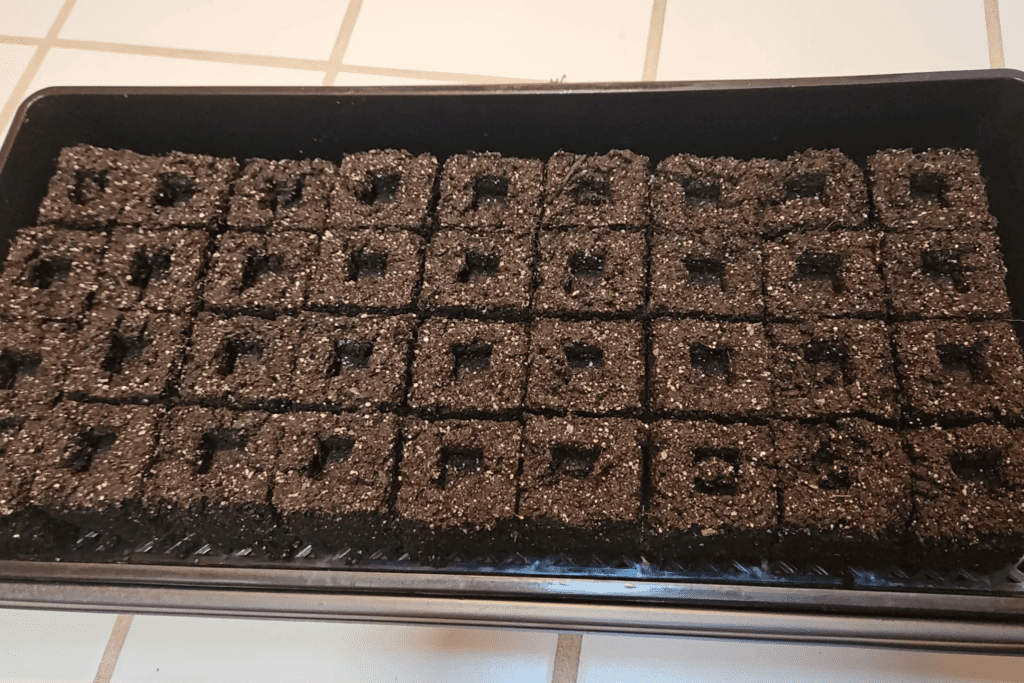
The next size soil block is made with a tool that leaves an impression the exact same size as the micro blocks. This allows for a convenient potting up process.
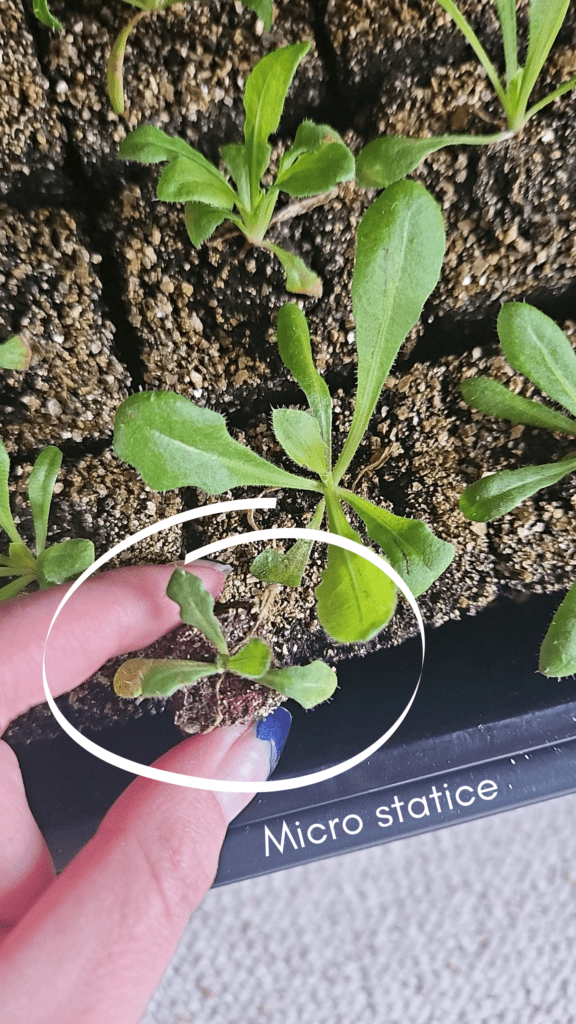
Micro Statice plants have been dropped into the larger blocks, and now have space to grow their roots and access to new nutrients. It is best to transfer while both the micro and the large soil blocks are recently watered. Dry soil will not be easy for the roots to break into, and the seedlings will dry out.

Once the seedlings have established their roots into the larger blocks, their growth rate really takes off! This picture shows the size difference between a Statice seedling that has been in the large soil block for 12 days vs one that remained in the micro block.
It is better to “pot up” sooner rather than later to allow your seedlings the space and nutrients they need, but be prepared for the increased spatial footprint after the potting up process. The next size soil block takes roughly eight times the amount of space as the micro block. Choose the largest and healthiest plants for potting up first to maximize success. It is common to have some losses from the initial micro block seedlings.
The seedlings continue to grow until it is time to be planted in the ground after the danger of frost has passed. This Statice seedling was started in mid-March, and this is how much it grew by the first week of June! The roots and leaves developed well, and it was ready just in time to be planted in the ground.

Watering
Bottom watering is an effective method for keeping the seedlings hydrated. This method involves filling a container larger than your tray with water, setting your tray within, but not submerged in the water. Soil will naturally wick water upwards and hold what it needs, but do not soak it to the point it becomes soggy.
These methods work with plastic cell trays as long as there are holes at the bottom, and this works for soil blocks that are placed in a mesh tray. I find the mesh trays work better than standard 1020 trays with drainage ridges and holes because the ridges are not flat enough for micro soil blocks to sit properly or get even absorption. The mesh trays are completely flat and even, and they drain faster too.
This method is gentle on the seedlings compared to watering from above which can cause seeds to “float away” or disrupt the fragile roots and leaves of new seedlings. If bottom watering is not reaching the surface well enough to hydrate seeds during germination, a light mist spray can be used to hydrate the surface. Watering from above only also makes it more difficult to tell if the soil is properly hydrated since the top will appear damp, but the soil might still be dry below the surface. Too much moisture on top can also promote unwanted algae growth or other pathogens on the surface to grow in the light. Bottom watering allows water to reach the root system without saturating the soil’s surface. As long as those roots get water, the top can stay high and relatively dry to avoid unwanted growth. The only time the surface needs to be visibly watered is during the germination process and early rooting.
After the soil has absorbed enough water, it is important to let the recently watered tray drain until it stops dripping to avoid water accumulation in the base tray. It is also important to allow the soil to dry out in between watering to prevent soil born pathogens which can cause root rot in fragile seedlings. As long as the seedlings are not showing signs of dehydration and are growing healthy, space out watering. Treat each tray uniquely. They might not all be on the same watering cycle. Trays that are closer to the fans may dry more quickly. Different types of flowers and growth phases have different watering requirements. It takes trial and error, but picking up the trays to feel their weight can help determine their moisture content, and picking up individual blocks to feel dampness or dry soil will help with watering judgement.
Grow Lights
Not all lights are created equal, and the type of light makes a difference in the effectiveness of plant photosynthesis and growth rate. The best light source for plants is the sun which contains the full spectrum of light. If you have a space that gets adequate hours of sunlight, this is best! This will most likely be a south facing window. While natural sunlight is the best source, indirect sunlight is sometimes necessary since the seedlings are fragile and may get a little “burned” with too much sunlight initially. A screen or shade will help, and then exposure can be increased over time.
If you do not have enough sunlight near your seedlings, you need to invest in “full spectrum” grow lights. These are the closest thing to sunlight providing multiple wavelengths of light to the plants. Using general household lights may not include the full spectrum, and the plants might not be able to use the lights effectively.
Next, you need to space your grow lights and your plant trays properly. Grow lights should be a few inches above the leaves of the plants. As the seedlings grow taller, the lights will need to be raised (or trays lowered), so be mindful of this in your grow space set up.
Without getting into the fine scientific details of what light is, plants physically capture and use light photons to go through the process of photosynthesis. The amount of light available at any given moment can actually be measured.
To achieve the plant’s light demands, you need a combination of light intensity and time.
Light sources with lower light intensity require more time “on” compared to sources with higher light intensity to achieve the same amount of usable light per day.
Running lights 24/7 will not achieve faster photosynthesis and growth because plants truly need a rest period. Considering variability in light intensity and a rest period for the plants, seedlings typically need 12 to 16 hours of proper light per day.
There is a science, and a math to figure this all out, but the easiest and most effective way to figure out how much light your seedlings need is to let the plants tell you themselves.
Not getting enough light: The plants start to appear “leggy”. Their leaves stretch towards the light and their stems grow too fast and narrow as the plant desperately tries to get closer to light. The stem is pale, weak, and the plants look top heavy and may even fall over. If this happens, bring the lights closer to the plants and/or add more lights.
Too much light: Plants will show signs of “burning”. Light patches appear on the leaves, especially the leaves closest to the light. They may wilt even if they are getting enough water. This is usually the result of the plants being too close to the light (such as growing taller and closer to the light), change in light settings (first time exposure to the sun without a filter), topical water droplets which magnify the light and can “burn” leaves, or the plant is not getting enough rest time in the dark such as a light timer setting mistake.
Even with the proper lighting conditions, it is important to rotate trays regularly. This will help expose different plants to even amounts of light over time, and it also encourages fuller leaf growth all around.
Full Spectrum lights include Ultraviolet light which is powerful and hazardous to your eyes, and may even cause fading colors in surrounding materials. It is important to turn the lights off or wear UV glasses while working with the seedlings. Cover the growing space to shield yourself and surroundings from the UV lights while in operation. I use a material called “panda film” which is white on one side and black on the other. The white side should face the inside of the nursery to reflect light back onto the plants. The black side simply helps prevent any light from shining through the film. Panda film is better than using foil or other reflective material because the foil is highly reflective and imperfect in texture. The dents and folds in the foil may cause reflected light to magnify in some spots which can potentially direct too much light to those sections and not enough to others.
Air Flow
Proper air flow is essential to maintaining ideal humidity in the growing space and simulating a realistic growing environment.
In the outdoor world, plants are exposed to wind which does two important things for growing plants:
- Wind helps remove moisture from soil, dries surfaces of the soil and plant tissue, and lowers the overall humidity of the surrounding air. This drying process will make the environment less habitable for moisture loving pathogens such as bacteria, fungus, and algae
- Wind forces plants to build resistance to being blown over. It literally triggers plants to grow stronger stems. Seedlings grown without wind are more prone to bend and break (Crick)
To bring the benefits of wind to the indoor nursery, set up fans and direct the breeze to flow across the seedlings. The fan settings should be just high enough to see the plant leaves shaking but not the whole stem bending over.
It is also smart to have humidity sensors placed within the nursery to monitor overall airflow effectiveness. The ideal humidity in the nursery is between 35% and 60%. The only exception is during the germination period when 75% or more is necessary. Humidity domes help to reach these levels (Harris Seeds).
Even with the help of fans, it is important to let seedlings “harden off” before planting outdoors full time. This includes short periods of being placed outdoors so the plants experience the natural wind, unfiltered sunlight, and cooler temperatures. This will reduce transplant shock and help them adjust to the outdoors faster.
Fertilizing
Nutrients were mentioned previously when talking about healthy soil, and seedling growth at different leaf stages. Here is a little more detail on how to monitor nutrients and fertilize when needed.
A healthy seed starting soil contains essential nutrients for a seedling’s growth. These are the building blocks of the plants themselves. It makes sense, as the plants grow, the nutrient content of the soil is slowly depleted. Within a few weeks, these nutrients will need to be replenished. Another benefit of soil blocking vs plastic cell trays is that by the time the seedling has grown and used up the nutrients in the micro soil block, it is placed in a larger soil block with rich soil. Seedlings in plastic cells will need to be fertilized earlier because they start out in a limited space.
To determine when it is time to fertilize, first, refer to the growing guidelines of the specific plant species. They may come with instructions to “fertilize after the first true leaves appear”. If you are potting them up into fresh soil, fertilizing is not yet necessary. If not potting up, seedlings will generally need to be fertilized every two to four weeks depending on their growth and nutrient requirements.
Just like their light requirements, seedlings will show signs if they are becoming nutrient deficient. Their leaves may change color, such as a reddish hue, and their growth will be stunted. Once access to nutrients is restored, their coloring will return to normal, and their growth should be noticeably faster.
I use organic OMRI rated fertilizers when necessary. Naturally sourced fertilizers can also be homemade. Most fertilizers are introduced through watering. Follow product instructions to mix the proper dilutions. Start with half or less than what is recommended and then work up from there to prevent “shocking” the seedlings.
Continue to monitor the plants for healthy root growth, and watch the color of the leaves for signs of stress.
Prepping your garden space in advance of planting is also important to set the stage for a successful outdoor growing season. Outdoors is where the most growth and then blooming phases occur which requires a lot of nutrients. We use Morgan Composting Dairy Doo which is a compost based fertilizer in our cut flower plot to prep the soil for the growing season.
Happy Growing!
Tips and Links
Seeds sources
Harris Seeds https://www.harrisseeds.com/?srsltid=AfmBOoqVoq3HHMwiYy9dFnTHvBLkUssqFRR6Td4yy5w0khTjBceiy_Ms
Safety
Search for budget friendly supplies, but always check reviews and device instructions to make sure they are Safe! Especially when it comes to heating pads, grow lights, and fans. Make sure to only plug into (extension cords, timers, power strips) sources as recommended that can meet the electric demands of the devices. Keep seedlings hydrated, but their growing space safe and dry.
Supplies such as grow lights, heating pads, fans, trays, soil block cutters, and more can be found across many online sources, but I recommend the “1020 mesh shallow trays” from Bootstrap farmer for the case of using micro soil blocks. Their shallow depth allows air flow to reach the micro blocks’ surface unlike standard trays. Bootstrap Farmer also has many other high quality greenhouse devices.
Morgan Composting is a Michigan company where we get our Seed Starter 101 mix and Dairy Doo compost fertilizer used for both cut flowers and lavender nutrients across the farm.
Recommend Youtube Channels
- Homemade and naturally derived fertilizers and gardening methods by Garden Like a Viking
- Soil blocking, watering, and more with Regenerative Gardening with Blossom and Branch Farm
- The 5 Biggest Soil Blocking Mistakes (And How to Fix Them)
- https://youtu.be/6JF0KJPwCAQ?si=Bryfoe4LXfTi5CI8
Works Cited
Crick, J. (2024, April 19). Wind is essential to natural processes. MSU Extension Natural Resources. https://www.canr.msu.edu/news/wind_is_essential_to_natural_processes#:~:text=In%20addition%2C%20wind%20blowing%20on,the%20growth%20of%20supporting%20cells.
Harris Seeds. (2024, May 7). Environmental Conditions for Seeding Crops Indoors. Harris Seeds. https://www.harrisseeds.com/blogs/homegrown/environmental-conditions-for-seeding-crops-indoors#:~:text=in%20your%20browser.-,Humidity%20and%20Temperature,%25%2C%20to%20ensure%20proper%20germination.
Whiteside, J. (2024, March 28). A Deeper Dive Into What “First True Leaves” Actually Means. Frosty Garden. https://frostygarden.com/2024/03/28/a-deeper-dive-into-what-first-true-leaves-actually-means/